
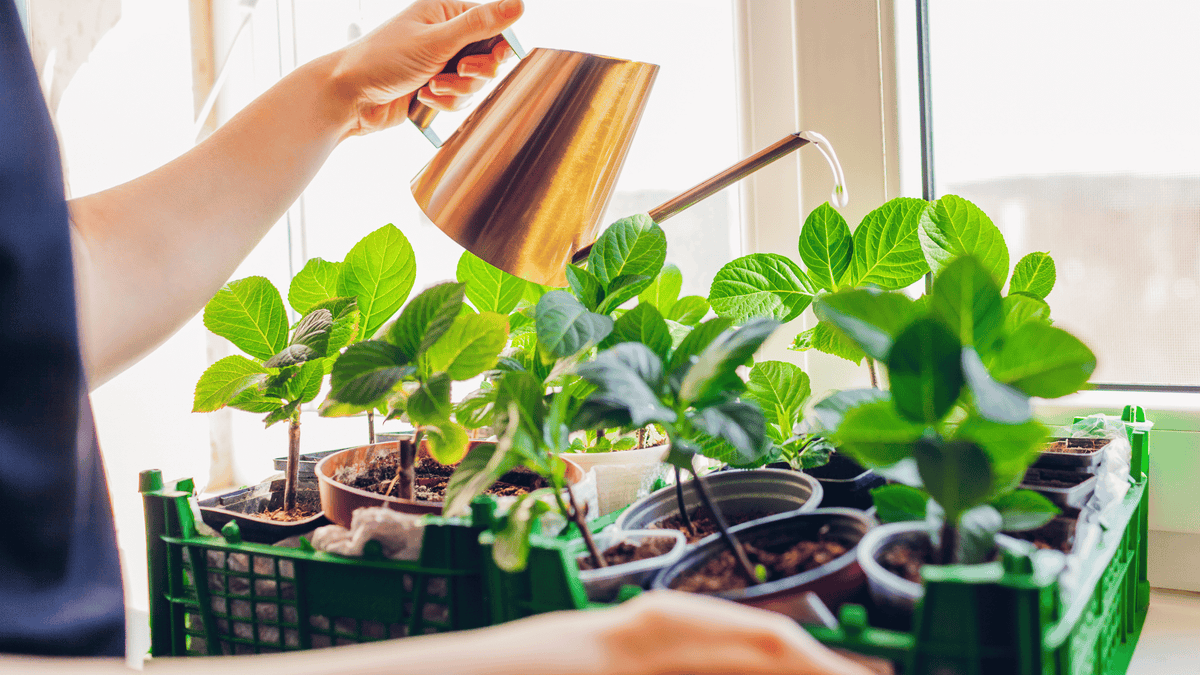
Hydrangeas are unusually obliging shrubs to propagate. Most of the familiar garden species can be rooted from cuttings, while a low branch can often be layered with little more than some loose soil and a weight to hold it in place. The two methods suit rather different circumstances: cuttings are quicker and allow several young plants to be raised at once, whereas layering is slower but particularly dependable because the developing plant remains attached to its parent while new roots form.
Both are vegetative methods, which matters when the parent is a named cultivar. A cutting or rooted layer is a clone of the plant from which it came, so its inherited characteristics are retained. Seed is different, because seedlings are genetically variable and cannot be relied upon to reproduce a named hydrangea exactly. For wider advice on position, soil, watering, pruning and long-term care, see our guide to growing hydrangeas in Ireland.
Cuttings or layering: which method is better?
For most gardeners, cuttings are the more useful starting point. Hydrangea macrophylla and Hydrangea serrata are especially willing to root, but H. arborescens, H. paniculata and H. quercifolia can also be propagated successfully from suitable young growth. A single healthy shrub may provide several cuttings without materially changing its appearance, and soft shoots can produce roots within a few weeks when moisture and light are well managed.
Layering is better when only one or two new plants are wanted, particularly if the parent shrub already has pliable lower branches close to the ground. It requires patience, usually allowing about a year before the rooted section is separated, but the risk of the stem drying out is much lower because it continues receiving water from the established root system. Older hydrangeas sometimes do part of the work themselves, with low stems rooting naturally where they remain in contact with damp soil.
When to take hydrangea cuttings
Spring and early summer are particularly suitable because hydrangeas are producing vigorous, soft new shoots that have not yet become woody. Cuttings can still root later in the growing season, but firmer growth generally takes longer, and a cutting rooted early has more time to develop a useful root system before winter. The calendar is less important than the condition of the shoot: fresh, flexible growth is preferable to an old, hardened stem.
Choose a healthy shoot without a flower or developing flower head. A cutting taken from vigorous vegetative growth can devote its resources to producing roots rather than supporting a bloom. If possible, take cuttings while the parent plant is well hydrated, and do not leave the severed shoots lying about in sun or wind. Hydrangea leaves lose water remarkably quickly once separated from the plant.
How to propagate a hydrangea from cuttings
A small clean pot, a light moist potting or propagation mix, sharp secateurs, scissors and a label are sufficient for a straightforward home method. Rooting hormone may improve the speed or quantity of root formation, but hydrangeas are not dependent upon it, so its absence should not prevent an otherwise well-prepared cutting from succeeding.
- Prepare the pot first. Fill it with a clean, light growing medium and moisten it thoroughly, allowing surplus water to drain. Heavy garden soil is a poor choice for a small cutting because the young stem needs moisture without sitting in a dense, saturated medium.
- Select a young non-flowering shoot. A piece roughly 10 to 15cm long is convenient for home propagation. It should contain healthy nodes, the points on the stem from which leaves emerge, and should still be relatively soft rather than heavily woody.
- Remove the lower leaves. Strip the foliage from the lower part of the cutting, leaving a small number of leaves at the top. Make the lower cut just beneath a node.
- Reduce excessive leaf area. If the remaining leaves are large, cut them approximately in half. The leaf still provides energy for the cutting, but the smaller surface loses less moisture while the stem has no roots with which to replace it.
- Remove the soft growing tip if necessary. Pinching out the tender tip, and certainly any developing flower bud, reduces the amount of growth the unrooted cutting has to support.
- Use rooting hormone only if wanted. Dip the base lightly and tap off the excess. More is not better. If using powdered hormone, place a small quantity in a separate container rather than repeatedly dipping cuttings into the main supply.
- Insert the cutting. Make a hole with a dibber or pencil and place the lower stem into the medium, then firm gently around it. Several cuttings can share a pot initially provided their leaves are not excessively crowded.
- Protect it from moisture loss. Place the pot in a shaded, sheltered position and keep the medium consistently moist rather than saturated. A clear plastic bag or an inverted clear plastic bottle can help retain humidity around the foliage.
Light, moisture and rooting conditions
Managing water is more important than elaborate propagation equipment. The cutting has leaves that continue to lose moisture but initially no functional root system to replace it, which is why direct sun, drying wind and a neglected pot can undo otherwise careful preparation very quickly. Bright shade or indirect light is preferable while roots are forming. At the other extreme, constantly sodden compost deprives the base of the cutting of the conditions needed for healthy root development.
Soft hydrangea cuttings can begin rooting surprisingly quickly, sometimes within two to four weeks under favourable conditions, although firmer material may require considerably longer. There is little advantage in disturbing the cutting repeatedly to see what is happening below the compost. Continue providing steady moisture and shelter until the plant is clearly established and has developed a useful root system.
Once well rooted, separate cuttings that have been sharing a pot and move them individually into suitable potting compost. A newly rooted hydrangea is still a young plant rather than a miniature version of a mature shrub, so it should be established gradually. Small pots are particularly vulnerable to drying, waterlogging and severe winter exposure, and a sheltered position is sensible while the roots are still limited.
How to propagate a hydrangea by layering
Layering uses the hydrangea's tendency to form roots from a stem that remains in prolonged contact with moist soil. The principal advantage is security: while the buried section is producing its own roots, the stem remains attached to the established shrub. It is therefore an excellent method for a valuable plant, or simply for a gardener who wants one reliable new specimen rather than a tray of cuttings.
- Choose a low, flexible stem. It must bend naturally to soil level without splitting or being held under excessive tension.
- Find the point where it meets the ground. Loosen the soil beneath this part of the branch and form a shallow hollow or short trench.
- Prepare the buried section. Remove leaves that would otherwise be covered. Lightly wounding the underside of the stem can encourage rooting, although hydrangeas may root without this treatment.
- Set the stem into the soil. Cover the prepared section with loose soil while leaving the end of the branch exposed above ground. A useful length of leafy shoot should remain beyond the buried section.
- Hold it securely. A stone, brick or suitable pin can keep the branch firmly in contact with the soil. The weight also helps conserve moisture immediately around the buried stem.
- Keep the area moist. Layering is forgiving, but a buried stem cannot root successfully if the surrounding soil is allowed to become persistently dry.
Do not be in a hurry to detach the new plant. Allowing roughly a year gives the buried portion time to form a stronger independent root system, and separating and moving it during the dormant period is preferable to disturbing a newly rooted layer in warm summer weather. Once substantial roots are present, cut the connecting stem between the new plant and the parent, then lift and replant the layer with as much of its young root system intact as possible.
Can every hydrangea be propagated this way?
The common garden hydrangeas are generally good subjects for vegetative propagation, although not every species roots with identical ease. H. macrophylla and H. serrata are particularly straightforward, while other species may take more time or respond less uniformly. This is one reason a failed cutting should not immediately be taken as evidence that the method is wrong. Shoot maturity, moisture, temperature and the condition of the parent plant all influence the result.
Some hydrangeas also produce suckers or naturally rooted shoots that can be separated when dormant. Hydrangea arborescens, in particular, may develop colonies through suckering, while older shrubs of other species sometimes have low branches that have already rooted before the gardener notices them. Where this has happened, lifting an established rooted section can be easier than beginning again with a cutting.
Why hydrangeas are not normally propagated from seed
Hydrangea seed can germinate, and raising seedlings has an important place in breeding and in growing variable populations of species. It is not, however, the sensible method for copying a favourite named cultivar. A seedling contains a new genetic combination, so its eventual flower colour, habit, vigour and other characteristics may differ from the parent.
If the purpose is to make another plant exactly like an existing mophead, lacecap, panicle or other named hydrangea, use a cutting or layer. That distinction is especially important when the particular flower form or cultivar character is the reason for propagating the plant in the first place.
Why hydrangea cuttings sometimes fail
- The cutting was too mature. Soft, actively growing shoots generally root more readily than old, hardened stems.
- The shoot was flowering. Non-flowering vegetative growth is a better choice because the cutting is not trying to support a developing bloom while also producing roots.
- The leaves dried out. Hydrangea foliage loses moisture rapidly after cutting, particularly in direct sun or wind.
- The medium remained waterlogged. Moisture is essential, but saturated, airless conditions are not the same as consistent moisture.
- The cutting was exposed to strong sun. Shade or indirect light reduces water loss while roots are still forming.
- It was discarded too quickly. Soft shoots may root within a few weeks, but firmer cuttings can take longer and should be given time if the stem remains healthy.
For producing several plants efficiently, cuttings are the better method; for one or two plants with the least dependence on careful humidity control, layering has much to recommend it. Neither requires complicated equipment, and both preserve the characteristics of the parent plant. If the starting point is choosing a hydrangea rather than multiplying one already established in the garden, the Hydrangea collection provides the broader range of plants, while propagation is best reserved for healthy specimens whose identity and performance are already known.


